
How to Create and Apply Styles in Google Docs

Get an additional set of headings, titles, and normal text styles for your documents. Pick a style in the sidebar and use it for any part of your text, or format the entire document in one click. You can also create your own sets from scratch and edit any of the default ones.
Before you start
For the add-on to see your headings when you apply a style to the whole document, identify your titles, headings and subtitles properly beforehand. Headings marked as normal text won’t be formatted as headings — they will get the formatting of the normal text.
You can identify them quickly using the Styles add-on itself, as described in Apply a style to the selected paragraphs. Or select your headings, click Normal text on the Google Docs toolbar, and apply the heading format you need.
Start the add-on
Open your document in Google Docs and go to:
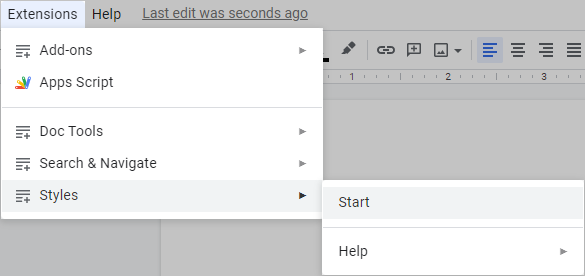
This opens the sidebar with the Google Docs styles:
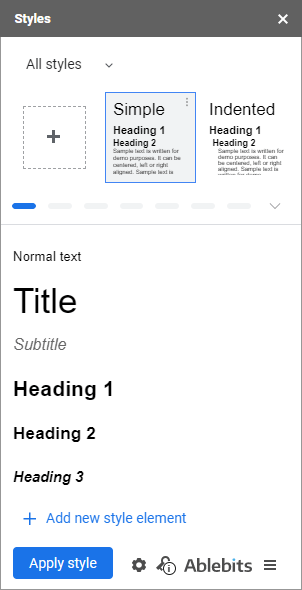
If you see Doc Tools instead, click the waffle icon at the top to switch to Styles:
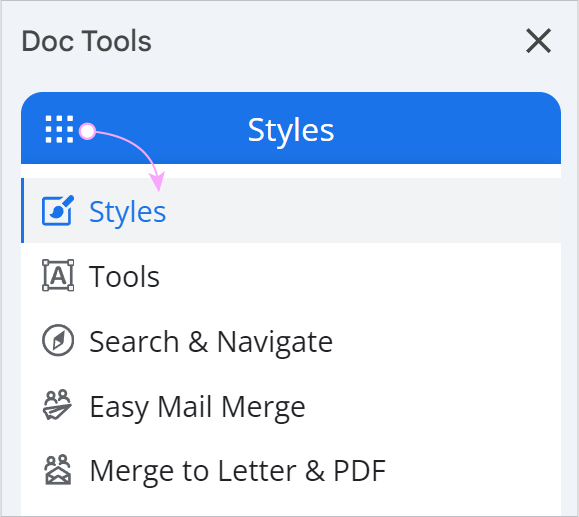
Create your own style sets or choose among the default ones
At the top you’ll find controls to add your own patterns and to see the list of sets supplied by Ablebits:
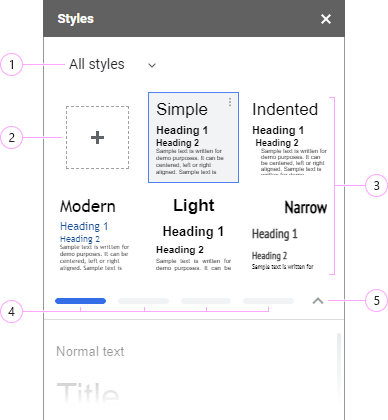
The numbers below match the markers on the screenshot above.
1. The styles supplied by Ablebits
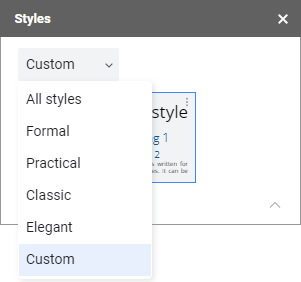
There are 20 Google Docs styles in the add-on, divided into 4 groups by how they look:
- formal
- practical
- classic
- elegant
as well as one common group with all sets.
One more group appears once you create your own sets, whether from scratch or by modifying a default one: Custom.
2. Create your own sets
If the default styles don’t meet your needs, you can create your own. There are three ways:
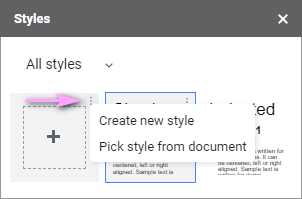
- Click the first square with a plus icon to add the style from your document to the add-on. You’ll be able to adjust its elements before saving, and apply it to any other document later.
- Or hover over it and click the three-dots icon in its upper right corner — it also offers to create a new style from scratch.
- Or right-click the tile to reach the same two settings from the context menu.
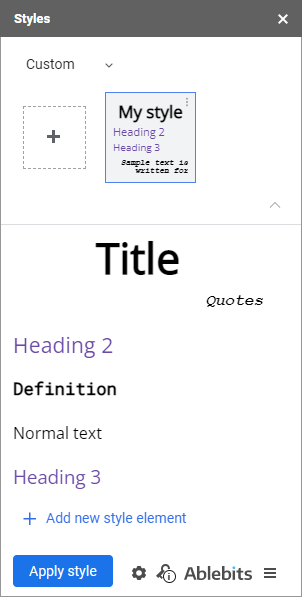
You can create new styles and edit existing ones so they fit any type of text in your documents. If you use quotes a lot, or definitions play a big role in your texts, devote entire elements within the style to them:
3. Extra options for a style
Click any tile, then the three dots in its upper right corner:
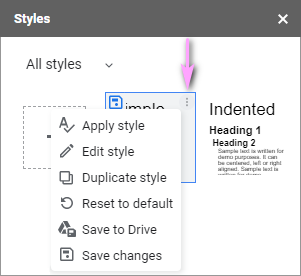
- The first option applies the selected style to your whole document.
- Edit style changes headings, fonts, alignment and more.
- Duplicate style lets you adjust a copy without overwriting the original.
- Reset to default undoes every modification you’ve made to a predefined style and returns it to its original form.
- Save changes keeps them.
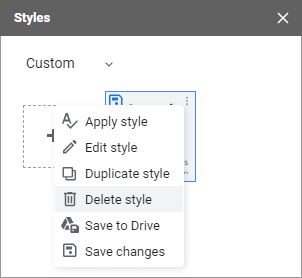
Reset to default is available only for the styles supplied by Ablebits. For your own styles you’ll see Delete style instead:
4. Page indicators
Look through all styles in the selected group using these page indicators.
5. Minimize or expand
The arrow icon minimizes or expands the area with all style tiles.
Preview Google Docs styles
Whichever style you select, you’ll see its full-size preview in the lower part of the add-on:
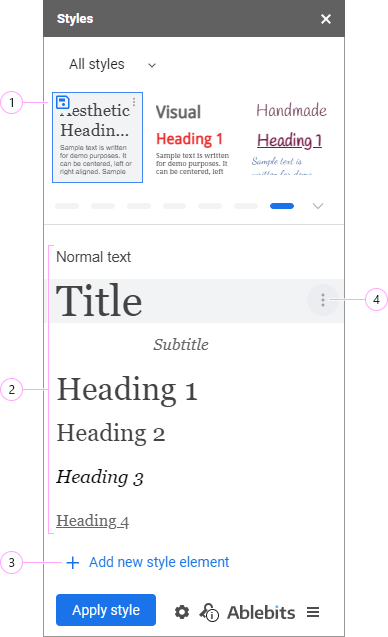
The numbers below match the markers on the screenshot above.
1. Unsaved changes
The blue floppy icon means some modifications have been made to the style. The add-on prompts you to save them before you move on to another set.
If you close the add-on without saving, you will be prompted again the next time you run the tool.
2. What the preview shows
See what each heading, title, subtitle and normal text from the selected style will look like in your document. You can also manage each element, and apply it to your selected text with a click.
3. Add more elements
If the standard set of Google Docs headings is not enough, add more with this option. The new element is added right away and asks you to name it first:
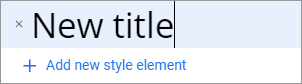
Hit Enter on your keyboard to confirm the label.
4. Handle each style element
Here you will find a few ways to handle each element individually:
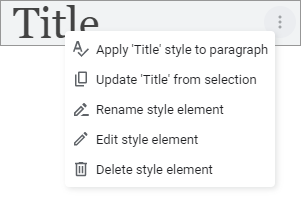
- Put your cursor in the paragraph you want to format and click Apply style to paragraph. The entire paragraph changes accordingly.
- Update from selection works the opposite way: it borrows the format of the selected text in the document and applies it to your style element in the add-on.
- Use Rename style element to customize the element label.
- To modify the look, go for Edit style element.
- Or Delete style element if you no longer need it.
Edit Google Docs styles
The add-on lets you tailor the pre-supplied sets as well as your own. Either way you get an editor in a separate window, with the options arranged around a small preview:
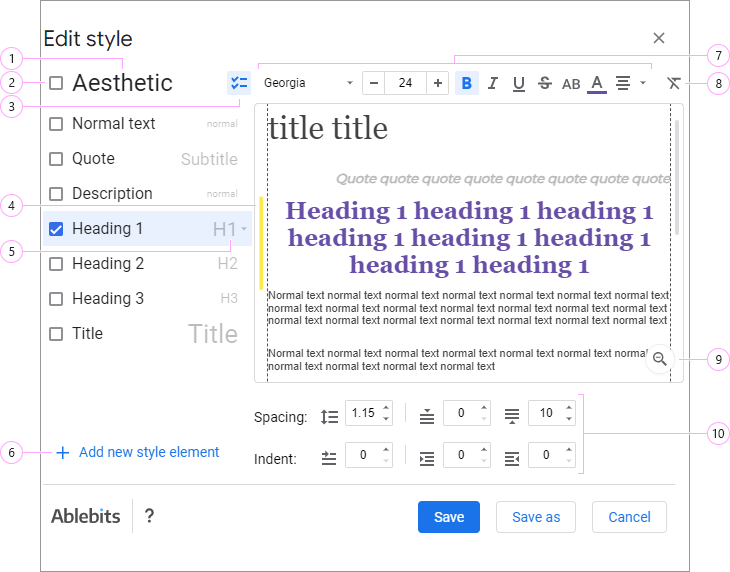
The numbers below match the markers on the screenshot above.
1. Name of the set
At the top you’ll find the name of the set. Click it to change, and hit Enter to confirm a new label — or Esc to cancel renaming.
2. Select every element
Check this box to select all style elements and format them in one go.
3. Show checkboxes
Show checkboxes with this setting to easily select multiple style elements for customization.
If the checkboxes are hidden, you can still pick several elements by pressing and holding Ctrl (or Cmd on Mac).
4. Selected elements
The selected elements are marked with a yellow line in the preview area, so you can spot them easily among the rest of the text.
You can select the elements you need by clicking them right in the preview area.
5. Heading type
Switch between different heading types for the element from this drop-down menu:
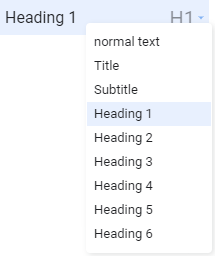
You can also right-click the element itself for extra possibilities:
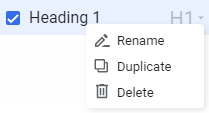
- Rename to change the element label.
- Duplicate to make a copy if you need a similar element with small adjustments.
- Delete to remove an unwanted element from the style.
Each style set can contain several elements of the same type — a couple of titles, a few subtitles — in case you’d like a choice. But when you apply the whole style to a document, only the format of the first instance is used. You can rearrange repeated headings within a set by dragging and dropping them.
6. Add more types
Whenever the available types are not enough, you can add more. They can fit any type of text in your documents — if you use quotes a lot, or definitions play a big role in your texts, devote entire elements to them:
7. Font, size, colour and alignment
Here you can modify the look of the selected elements: their font, font size and colour, text formatting and alignment. The real-time preview instantly shows how it all appears in the document.
8. Clear formatting
You can always revert your changes using the Clear formatting option.
9. Zoom
Use Zoom to alter the size of the preview.
By default it is 75%. For the real size of your document, set it to 100%.
10. Spacing and indentation
Spacing and indentation are adjustable for each element: line spacing (the space between lines within one paragraph), space before and after each paragraph, first-line indent, and left and right indentation.
When you’re ready, click Save to keep the changes. To avoid overwriting the original set, choose Save as instead — you’ll be able to give the new pattern a name, and it will appear in the Custom group.
Apply a new style to the selected paragraphs
Applying formatting from the add-on to your text takes two steps:
- Place the cursor in the paragraph you want to format.
- Click the element you need in the sidebar — Heading 1, Title, Normal text and so on.
If your text is normal and contains words in bold, italics, underline or strikethrough, one extra option keeps those formats unchanged when a new style is applied. It sits behind the gear icon at the bottom — tick the box before applying the style:
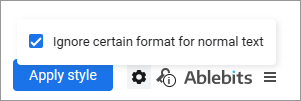
You can use a standard Google Docs option to apply the new format to all similar styles at once, for example to every heading:
- Right-click the text whose style you want to alter, e.g. Heading 1.
- Pick Format options > Select all matching text. This selects every occurrence of Heading 1.
- Click the style in the sidebar that you want to apply to all of them.
All bookmarks and links in your document stay intact.
Apply a style set to the entire document
If your document already has a structure of titles and headings, you can make it look polished in one click:
- Pick one of the designed style sets in the list. You’ll see its preview below the list in the sidebar.
- Click the Apply style button.
Every heading and text level in the document changes to match the set. Bookmarks and links are kept.
The same gear-icon option described above keeps bold, italic, underline and strikethrough on normal text unchanged when you restyle the whole document.
Apply custom fonts
Add a custom font to an existing style element
- In your document, apply your custom font to the text using the standard Google Docs font menu.
- Place the cursor inside that paragraph.
- Right-click the style element you want to modify on the add-on pane.
- Select Update … from selection from the context menu.
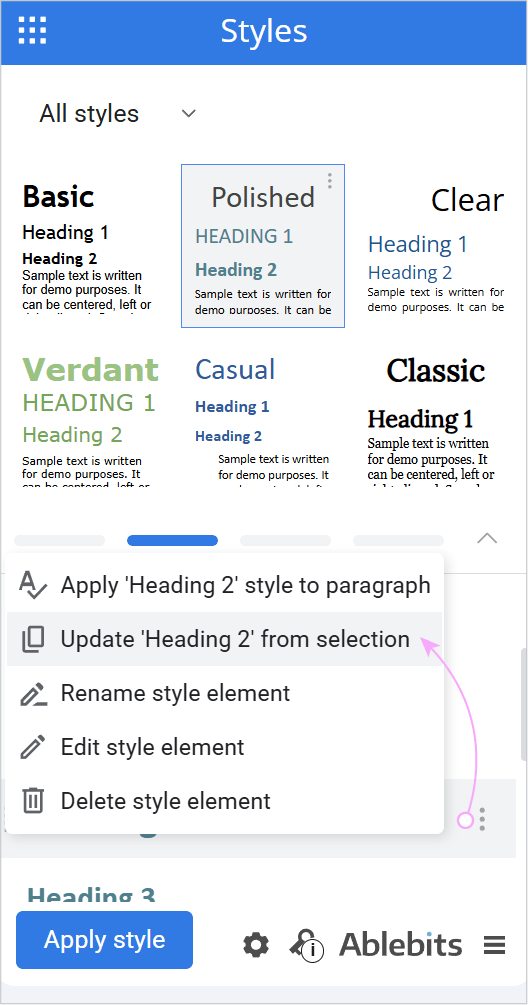
The element adopts the new font immediately, and the font is saved to the add-on’s library.
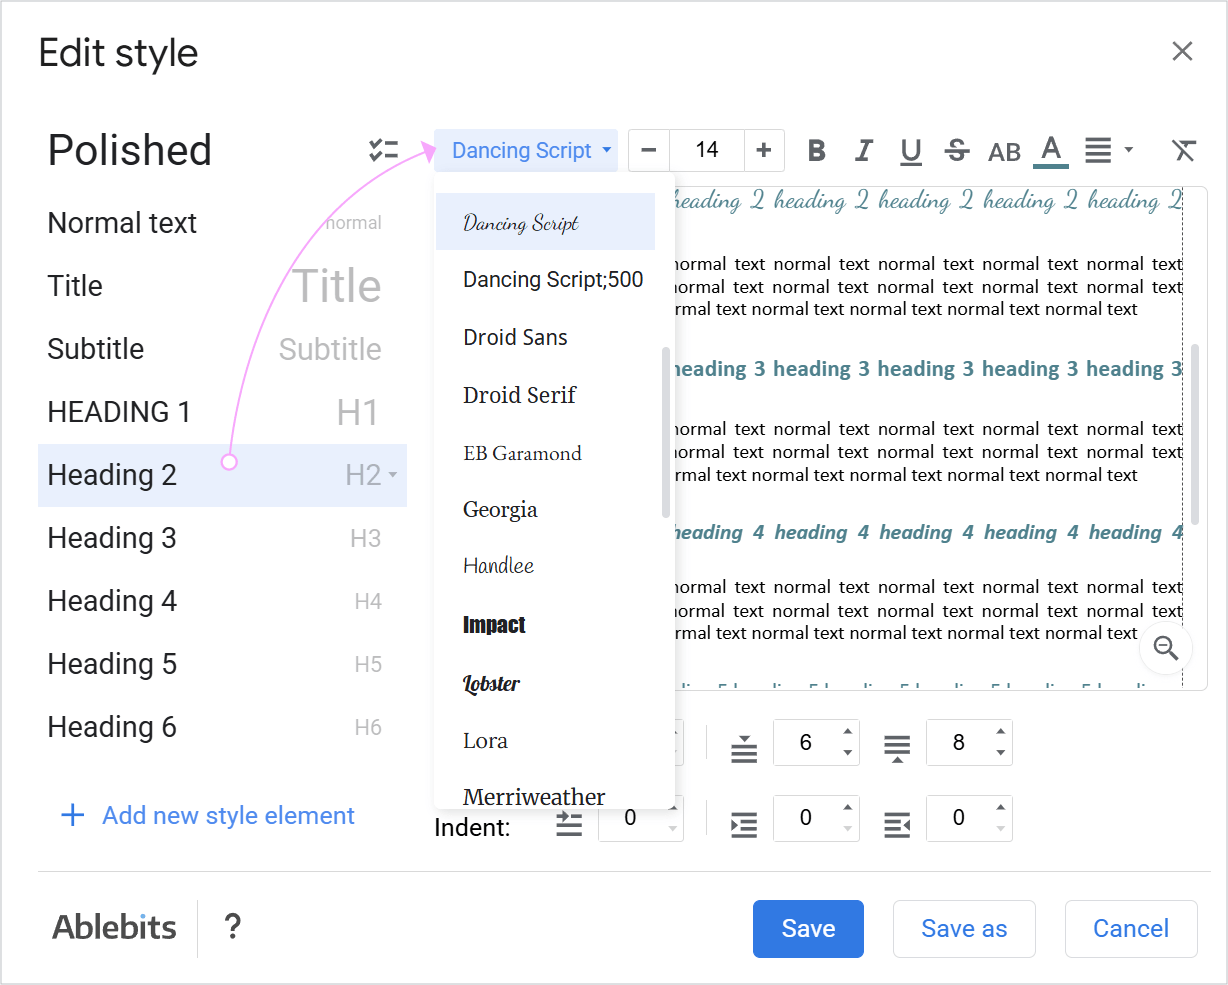
A custom font stays available in the editor’s drop-down list for as long as at least one style element is using it.
Create a new style element with a custom font
To add an alternative formatting option — a secondary Normal text, or another Heading 1 — using a custom font:
- Format a paragraph in your document with the font you want.
- Place the cursor inside that paragraph.
- Click Add new style element on the add-on pane.
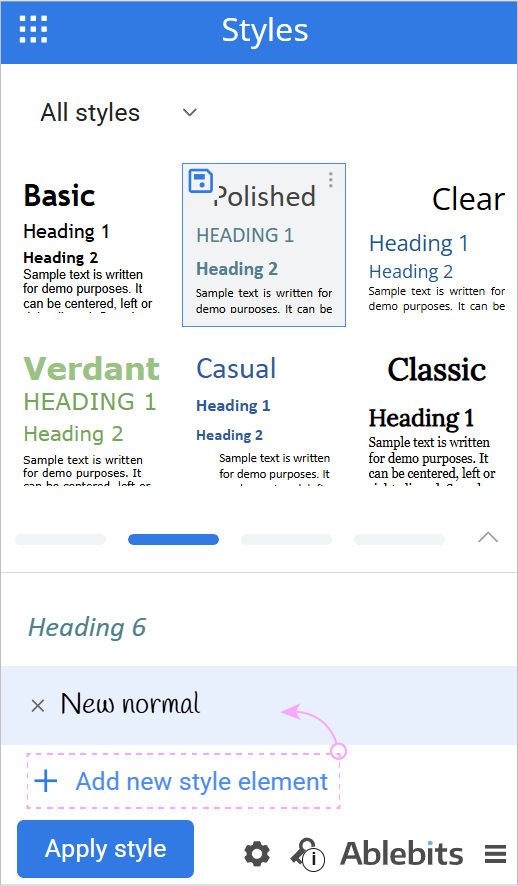
- Name your new element and press Enter to save the label.
This creates a separate style element configured with your custom font. Repeat to mix and match different fonts, giving yourself several formatting options within the same set.
Create a completely new style set containing custom fonts
You can also capture all the formatting currently used in your document at once:
- Format your document so that the text, titles and headings use the fonts you want.
- Click the first square with a plus icon — Add new style from document.
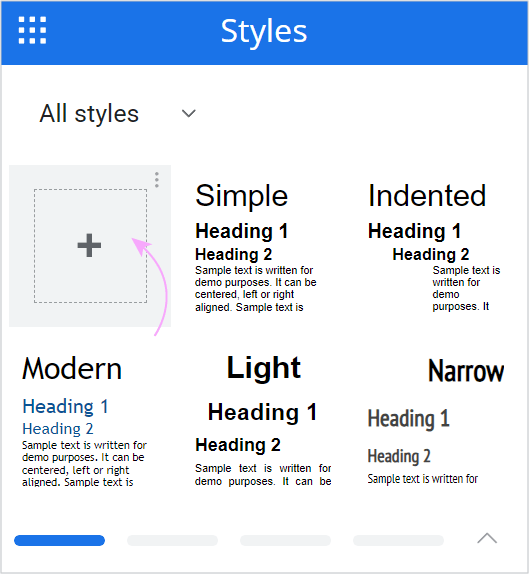
The add-on scans your document and saves all the styles it uses — normal text, headings and so on — as a new custom set. You can then adjust its elements and apply them to any future document.
During this scan the add-on captures formatting from the first instance of each text type. If your first Heading 1 uses Barlow Semi Bold, that is the font it saves; later Heading 1 variants using other fonts are ignored. To include those variants, add them individually with Add new style element.
Share custom styles: export and import
Every style you create can be saved to your Drive and imported back later. This lets you use the same templates under different accounts, or share them with teammates.
The export and import settings are at the very bottom of the add-on. Click the three-lines icon next to the Ablebits logo:
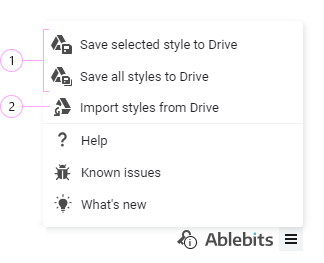
The numbers below match the markers on the screenshot above.
1. Export
The first two options export either the style you have currently selected, or all styles altogether. Once the add-on saves them to your Drive, you’ll see a confirmation saying how many styles were exported:
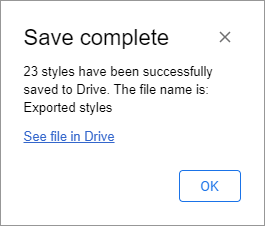
The add-on always saves the file to the root of your Drive. The message gives you a link to open Drive straight away, along with the name of the file to look for.
2. Import
The last setting imports styles back into the add-on from that file on Drive. A window appears first, inviting you to locate the file:
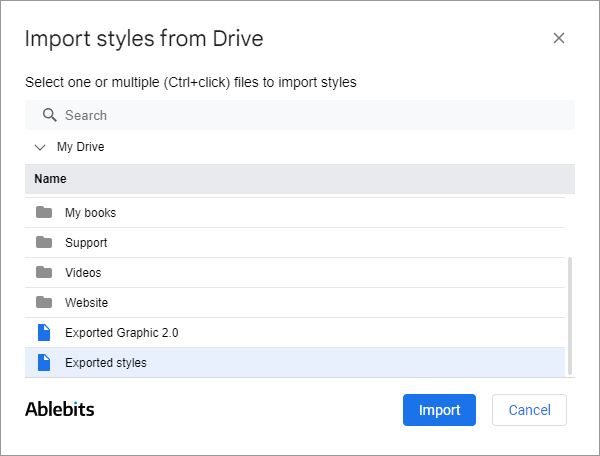
You won’t see other file types such as spreadsheets or documents here — so don’t panic if a folder looks empty when you know it isn’t.
If you don’t remember the exact location of the file, or simply don’t want to browse from folder to folder, use the Search field at the top of the Import styles from Drive window instead.
Enter a word the file name may contain and press Enter. The add-on scans all your Drive folders for exact and partial name matches, and shows what it finds in a tree view:
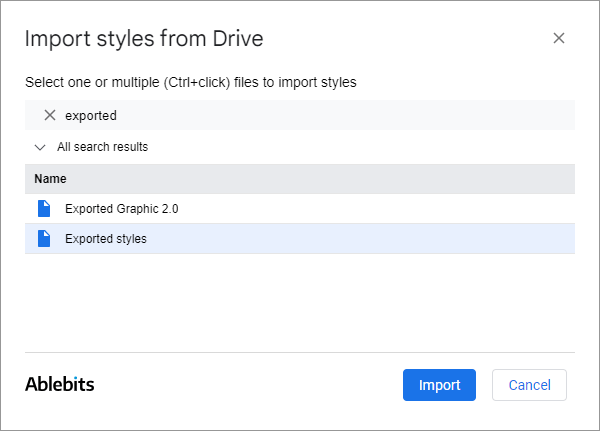
Find your exported styles and click Import. Another confirmation message tells you:
- how many styles have been processed — the total the file contains
- how many were added to your add-on successfully
- how many were ignored, because their settings completely match styles you already have
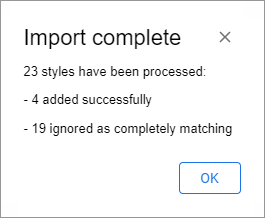
Hit OK and enjoy the imported styles right away.
