
How to run Google Sheets add-ons on a schedule

How scheduling works
Scheduling lets you set a specific time to run scenarios for Ablebits add-ons automatically.
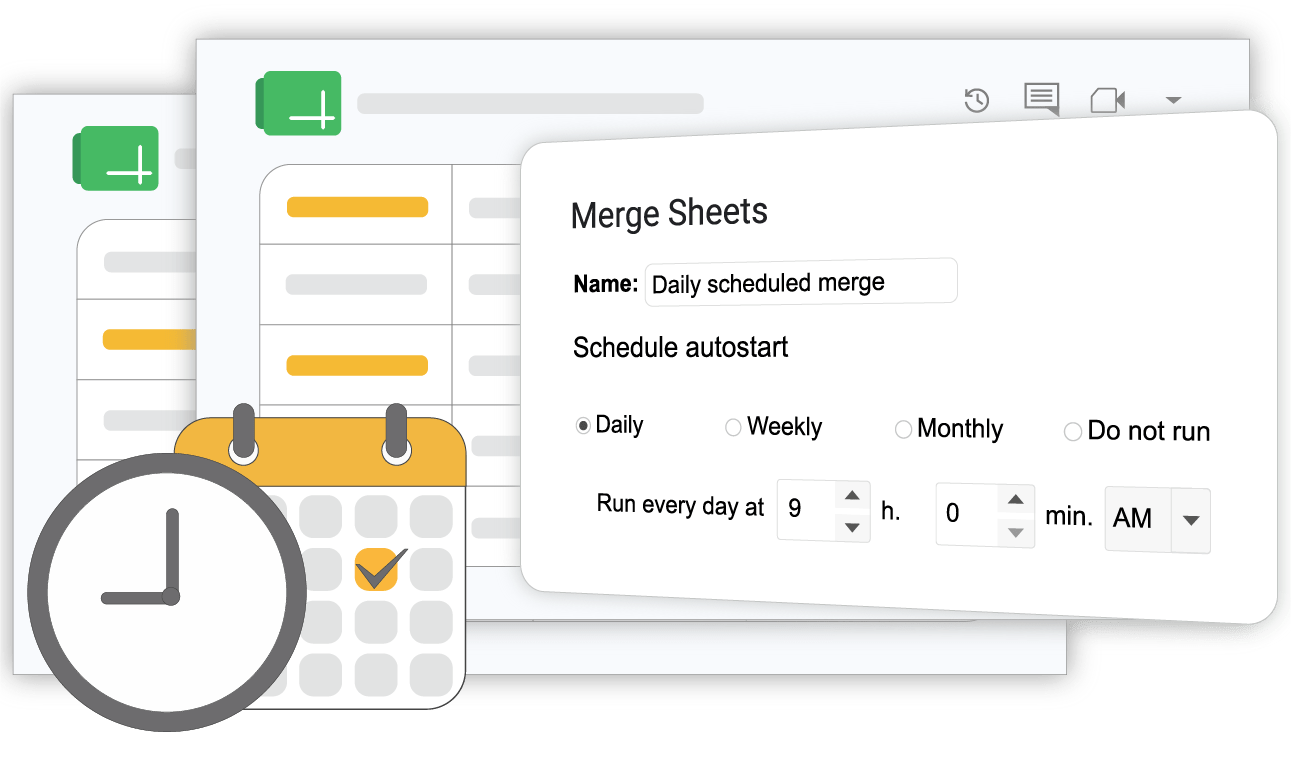
In this way, repetitive tasks in Google Sheets are completed without manual intervention each time. Since everything works in the Google cloud, your scheduled tasks will be executed even if you’re offline.
Setting up a hands-off workflow takes three steps:
- Configure and run: Set up the add-on and run it manually just once.
- Save scenario: Save these settings into a reusable scenario.
- Schedule autostart: Choose the frequency and time for automatic execution.
Once your scenarios are on the timetable, you stay in control:
- Change scenarios whenever — modify settings or cancel scheduled tasks at any time.
- Control performance — all automated processes execute reliably, with detailed logs available for review.
Scheduling is currently a beta feature for paid subscribers, and each plan includes a quota (opens in a new tab) for automated runs. If you have ideas on how to make this feature even better, feel free to share your thoughts at support@ablebits.com.
How to use Process Sheets to run Merge Sheets on schedule
To see how it works in practice, let’s walk through setting up an automated schedule for the Merge Sheets add-on. Suppose you need to update your master price list with new supplier data every day at 9:00 AM.
Step 1: Configure your rule and run
First, run Merge Sheets the way you normally would, and make sure everything works:
- Launch add-on: Open Merge Sheets from .
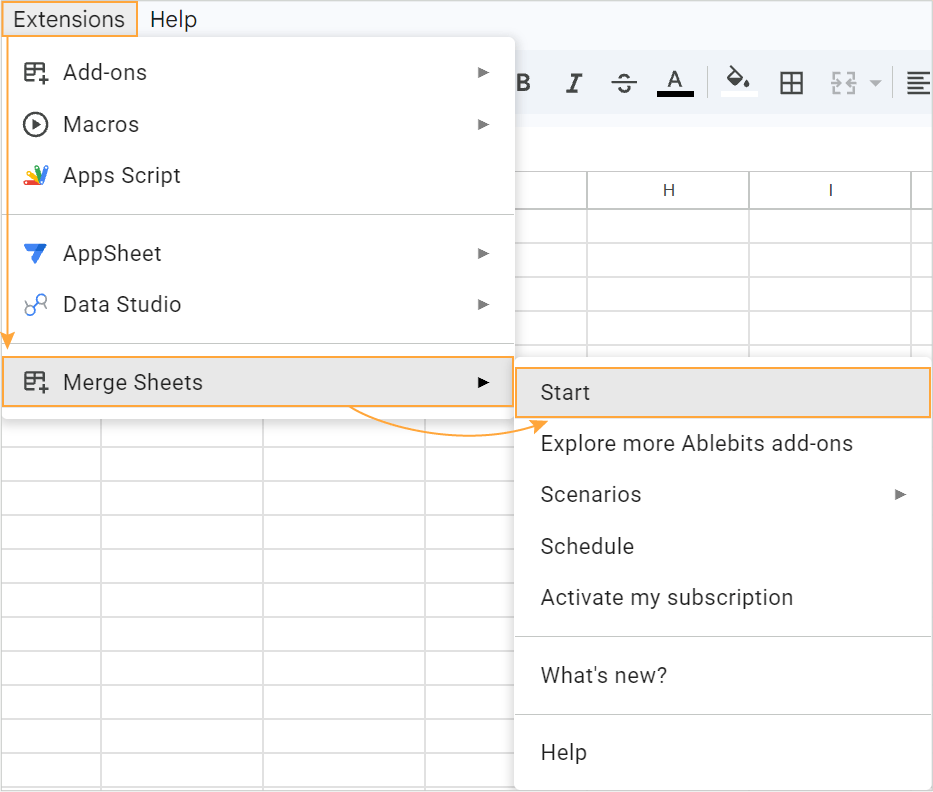
- Select data: Select your main price list and the supplier’s new lookup file.
- Choose key column: Choose your unique key column (e.g., SKU) to match records across both sheets.
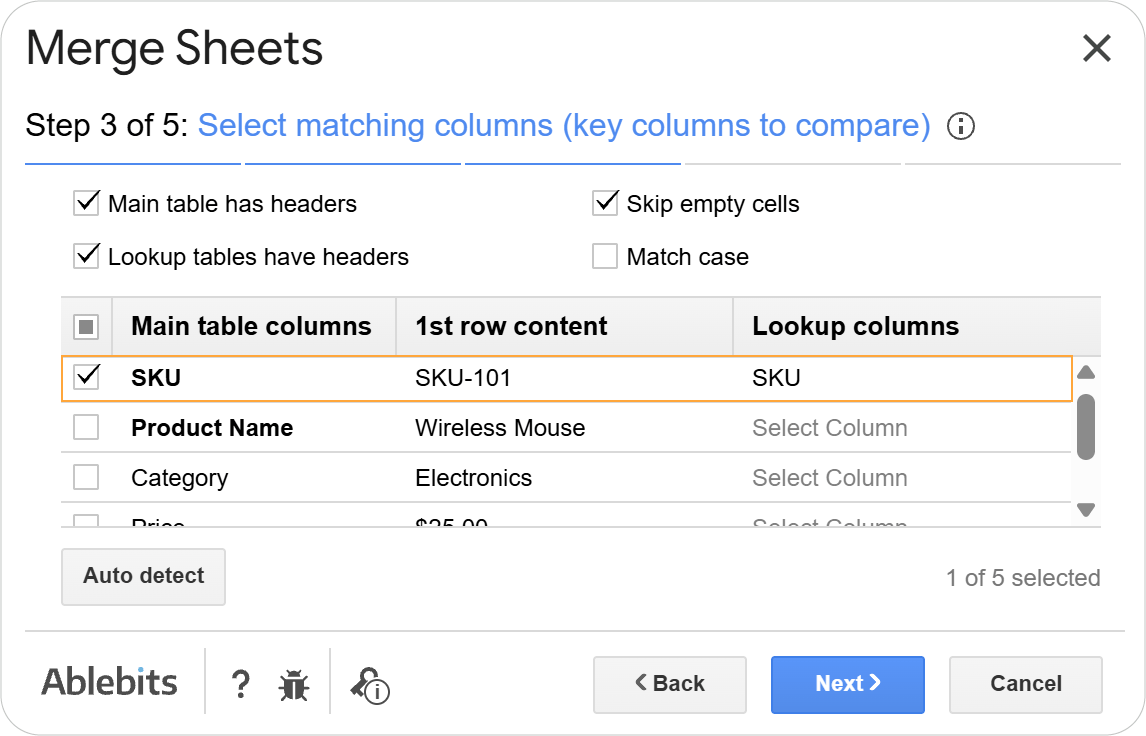
- Select columns to update: Select the columns to update (Price, Stock).
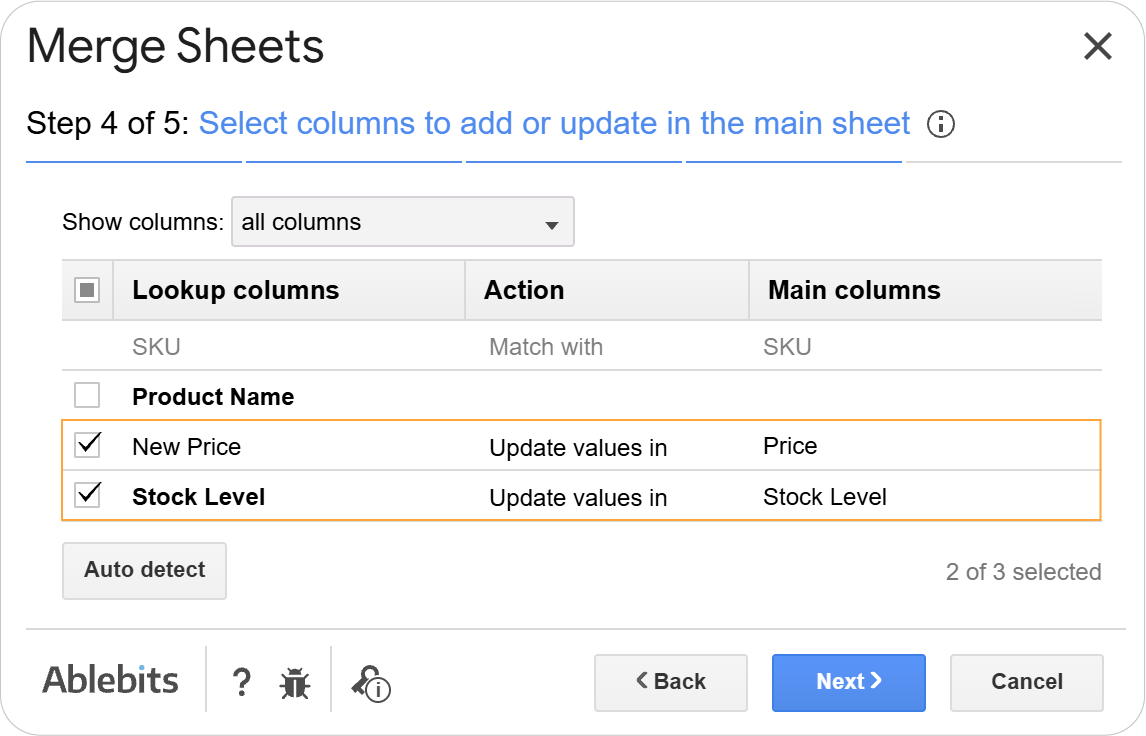
- Set additional rules:
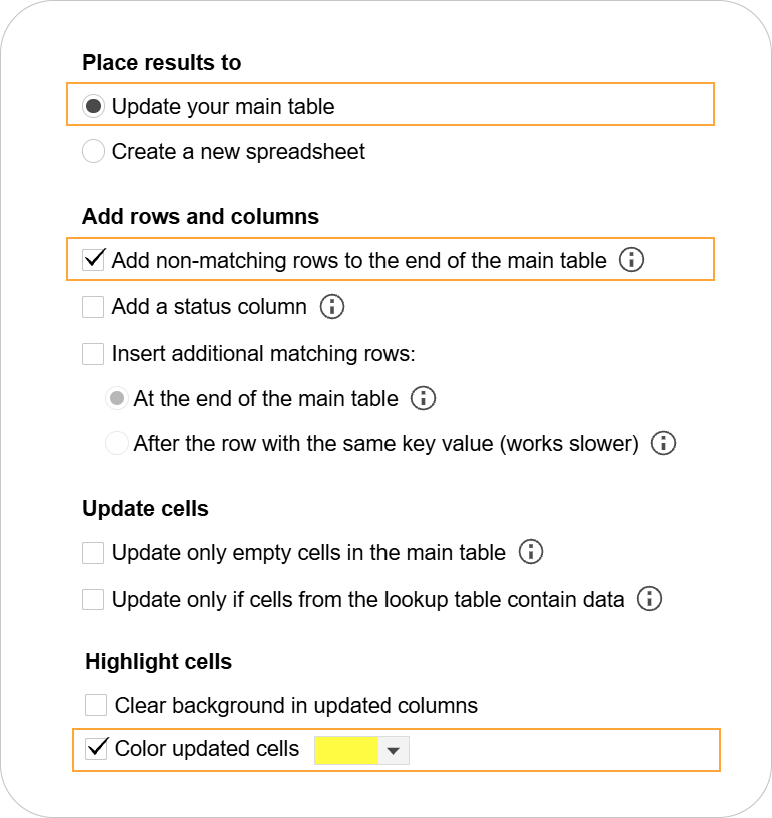
- Choose where to put the merged results: update your main table or paste them into a new spreadsheet.
- Check “Add non-matching rows to the end of the main table” to capture newly launched products.
- Check “Color updated cells” to instantly identify all updated values.
- Run: Click Merge to run the initial update.
Step 2: Save your settings as a scenario
Now that the merge has completed, save all the settings you just used so you don’t have to configure them again every day:
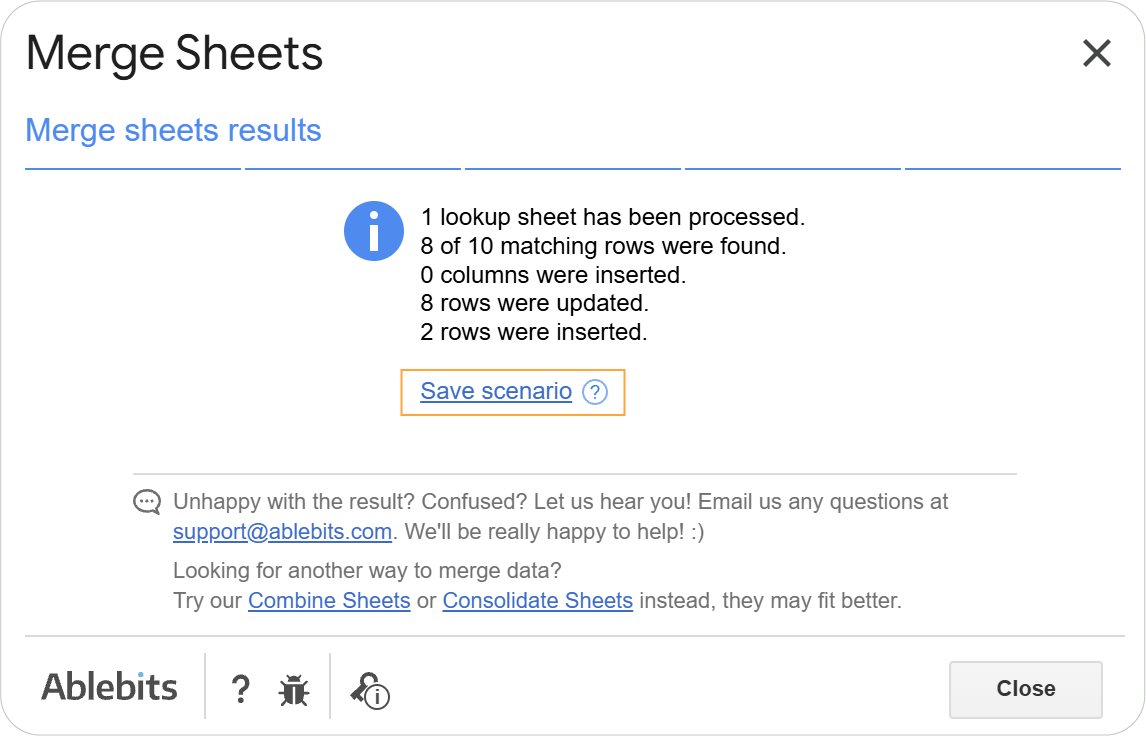
- In the success message window, click Save scenario.
- Give your scenario a clear name (e.g., “Daily price update”).
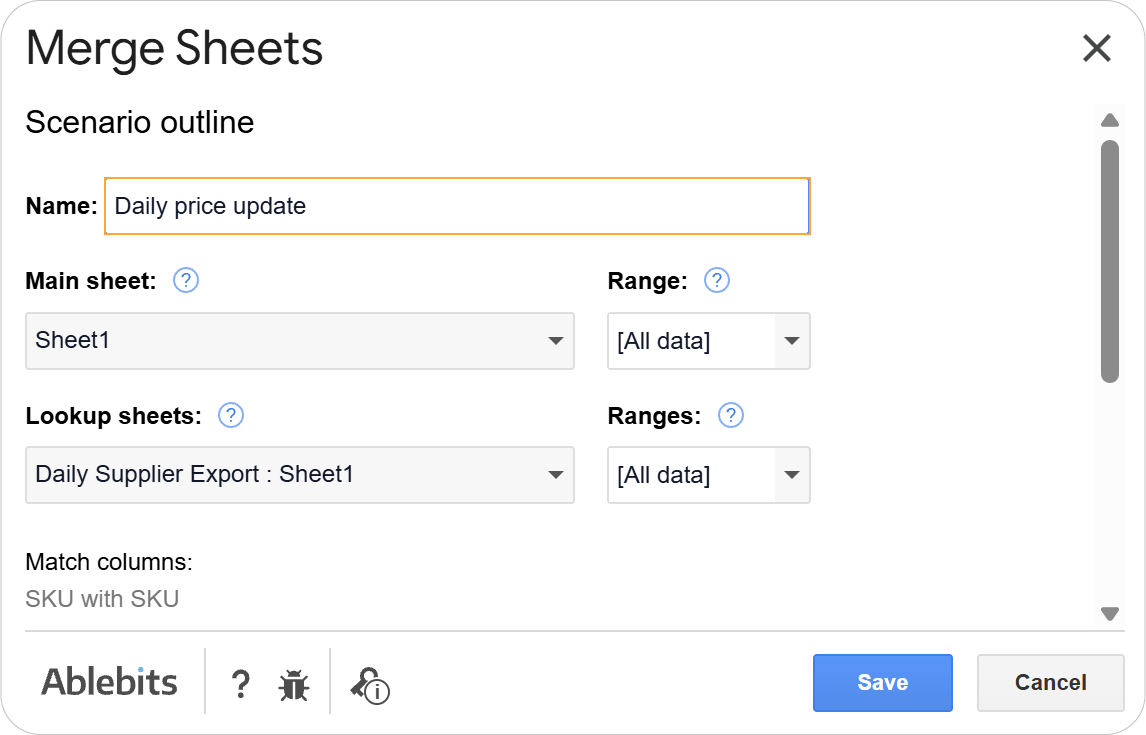
Here, you can also adjust the specific sheets and ranges for the scenario.
- Click Save.
Step 3: Set up recurring schedule autostart
To schedule the scenario to run automatically:
- Go to .
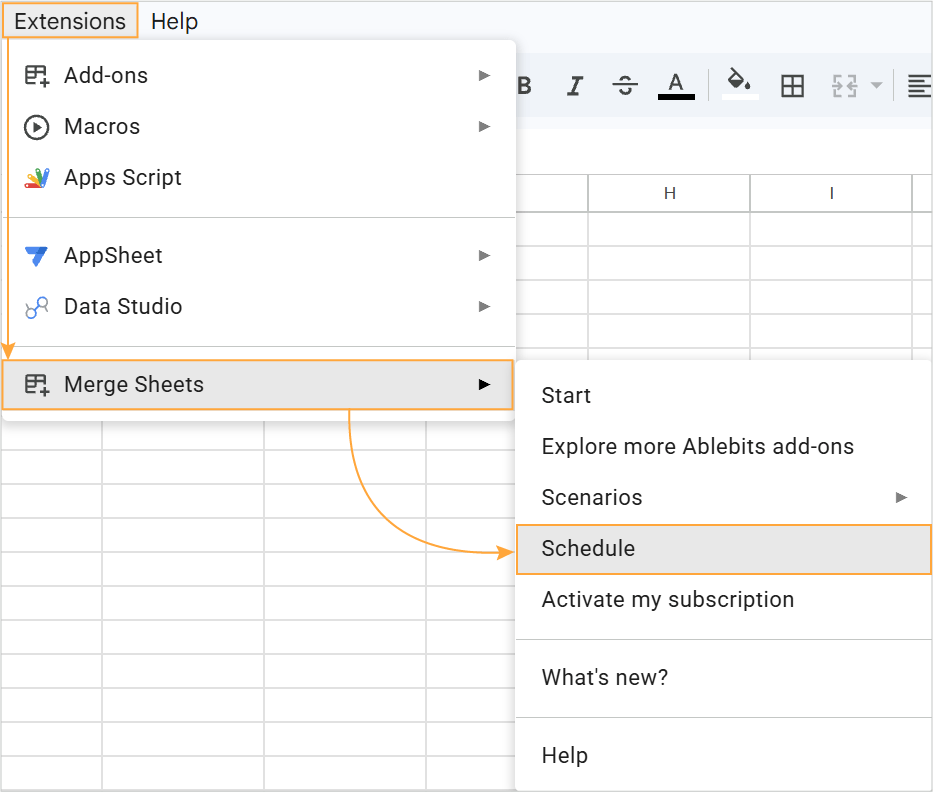
If this is your first time scheduling scenarios, the add-on will ask you to connect to the Process Sheets service.
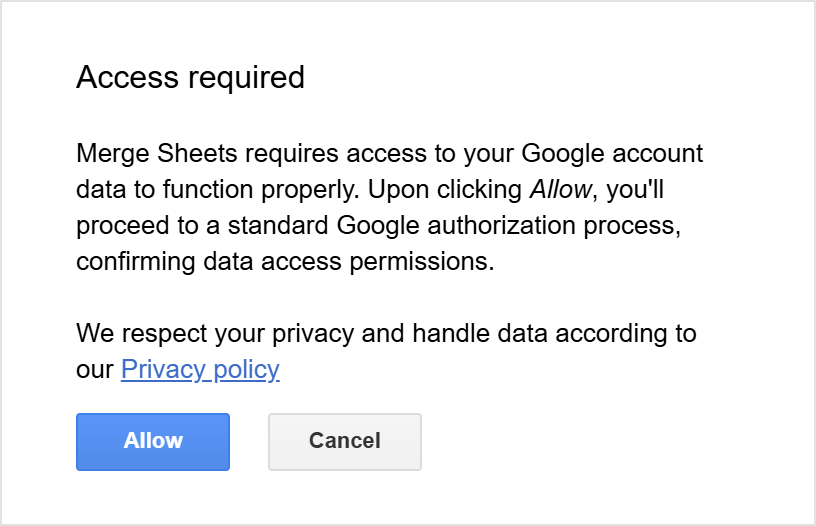
Why this permission is needed: It allows Merge Sheets to access your specified Google Drive spreadsheets in the background, strictly following your saved scenario settings even when your browser is closed.
- In the top section (Available to schedule), find your saved scenario.
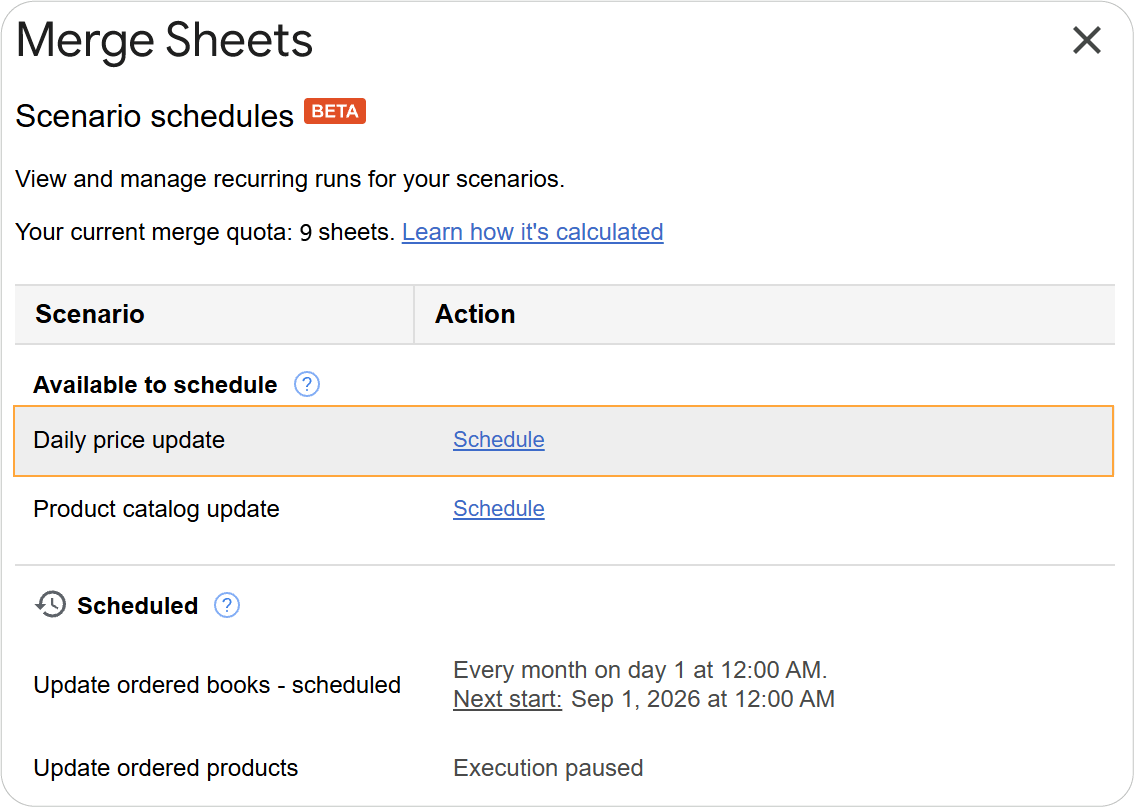
- Click on it to open its settings.
- Configure your scheduling options:
- Name: Keep the scenario name or adjust it.
- Frequency: Choose Daily, Weekly, or Monthly. For our example, select Daily.
- Time: Set your preferred start time (e.g., 09:00 AM).
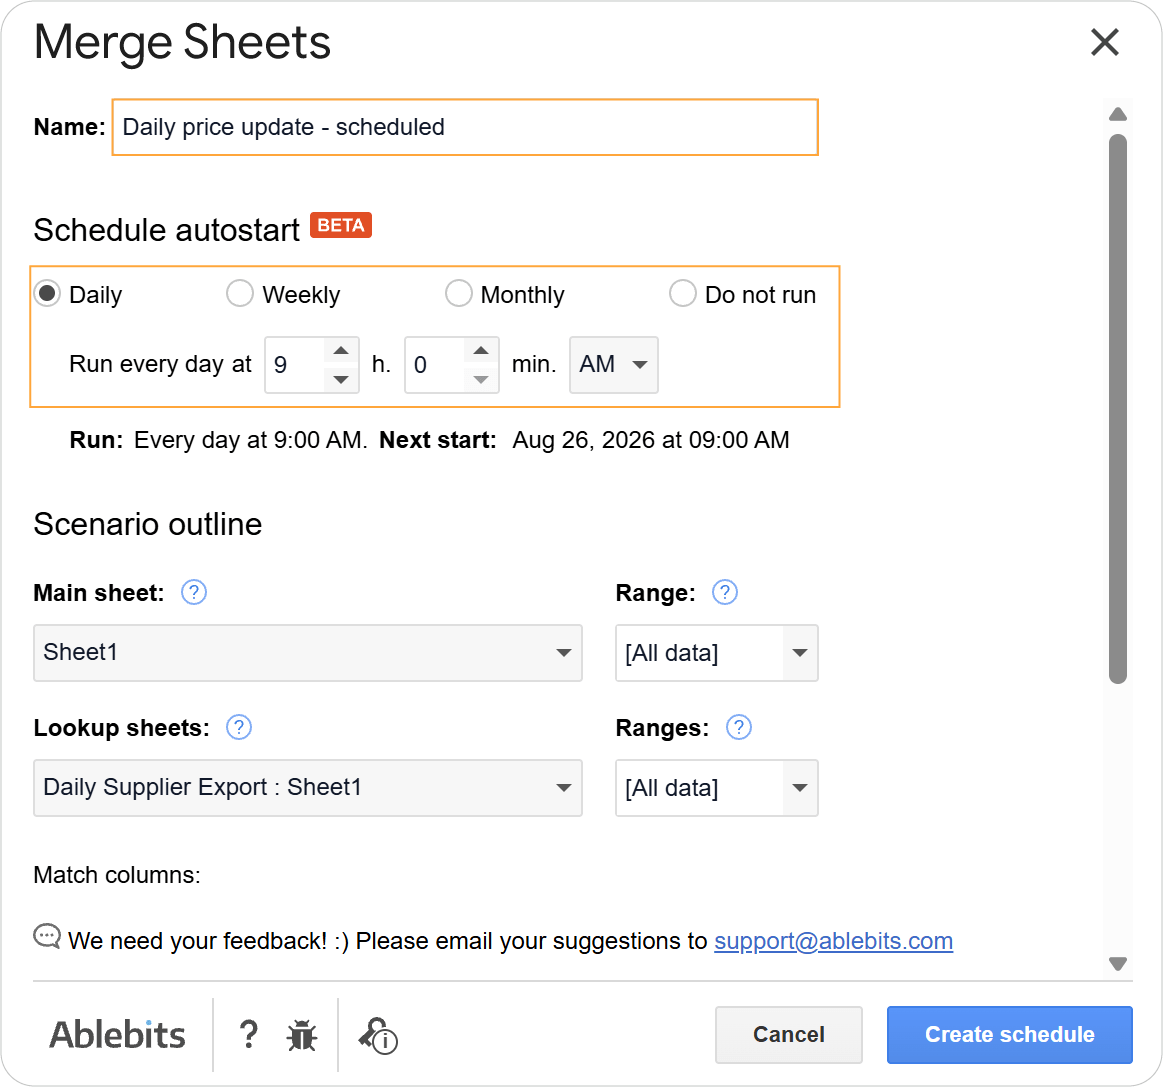
- Review the schedule summary at the bottom.
- Click Create schedule.
From now on, your scenario will run automatically every day at 9:00 AM.
Manage scenarios timetable
You can view and manage schedules for all your scenarios from one central place. Go to .
The summary timetable displays:
- Available to schedule: Scenarios that are prepped and waiting to be scheduled.
- Scheduled: Scenarios that are actively running on autostart.
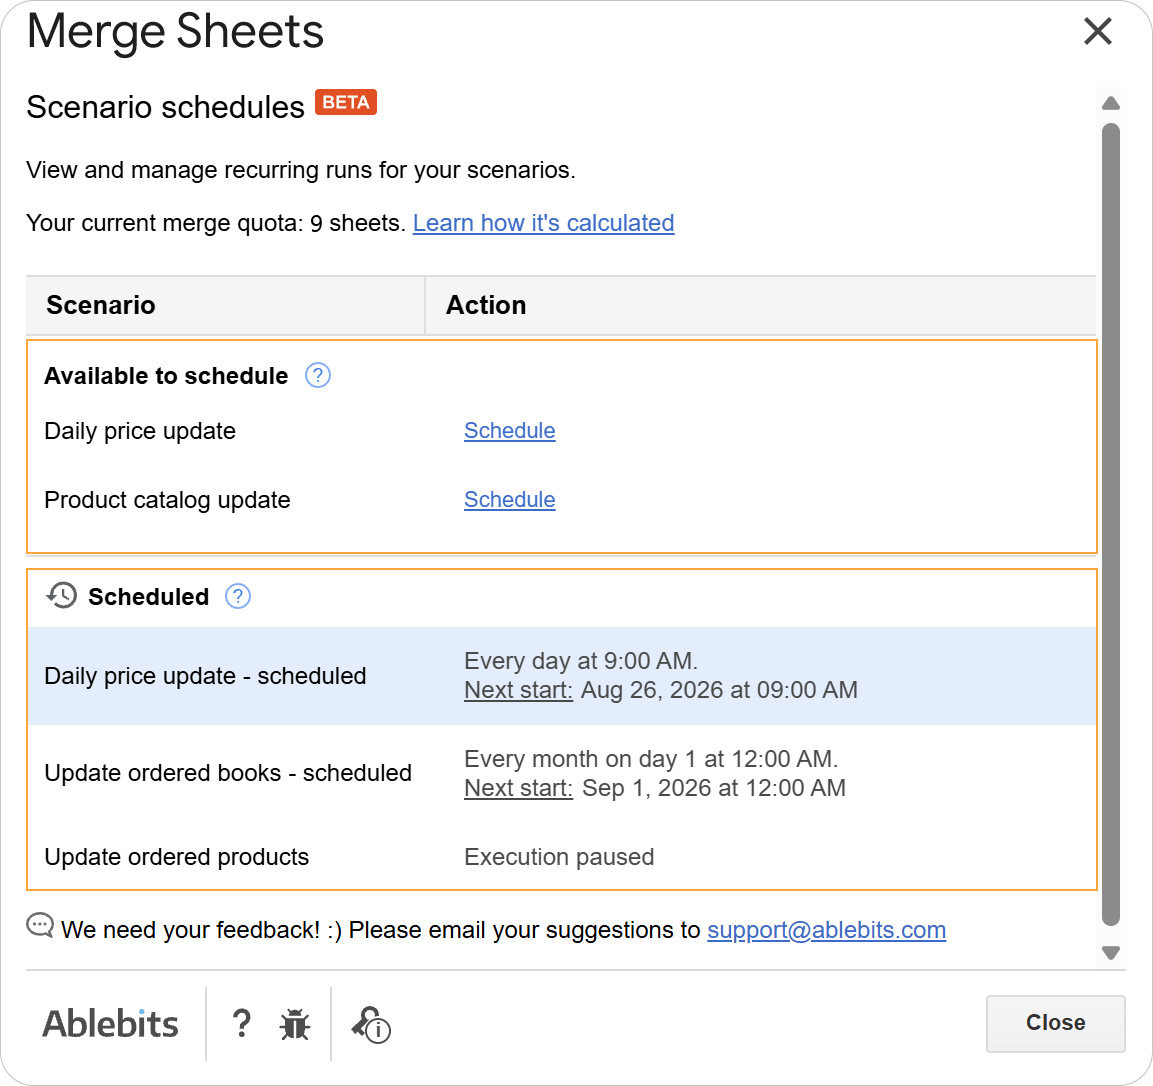
By clicking on scenarios that are already on the calendar, you’ll be able to manage all automated workflows:
- Change the execution time or frequency.
- Pause the schedule temporarily.
- Delete the schedule if it is no longer needed.
Keep track of automatic runs
The add-on keeps a log of all automated scenario runs. You’ll find it in a Logs sheet next to your resulting table (either in the original file where your main sheet is updated or in a newly created output file).
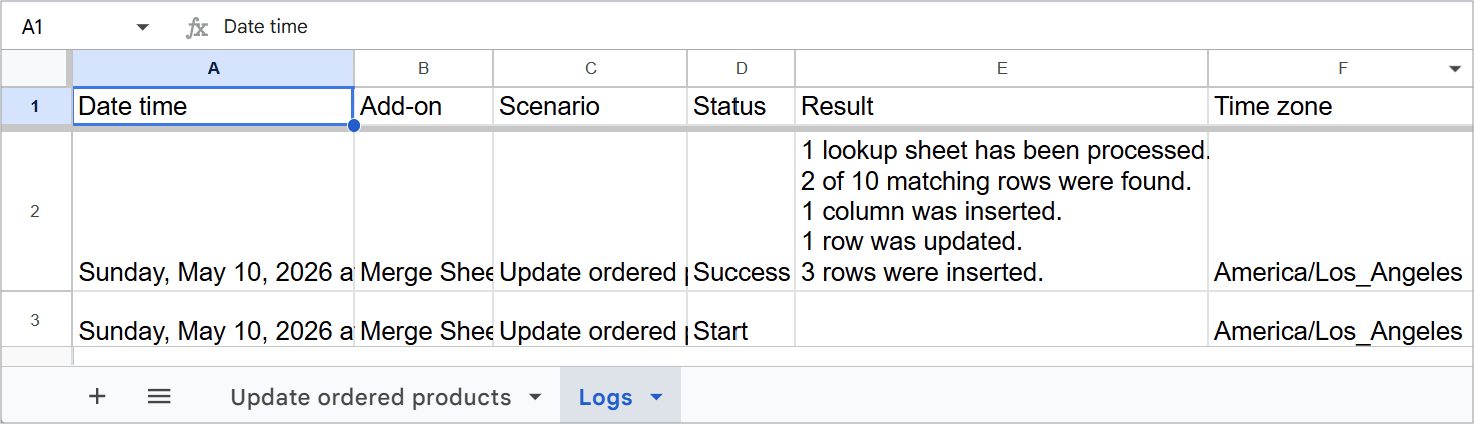
The Logs sheet records:
- Timestamp: Execution time (including time zone).
- Status: Clear confirmation of successful runs or short error descriptions if a run fails.
- Result: Total updated cells or added rows.
FAQ
Is there a way to automate Google Sheets?
Yes. Depending on your needs and technical skill level, there are three primary ways to automate Google Sheets:
- Add-ons: The fastest no-code solution. Tools like Ablebits allow you to save your data operations (e.g., merging sheets) into Scenarios and schedule them to run automatically in the Google cloud on a daily, monthly or weekly timer.
- Google Apps Script: A coding-based approach where you write JavaScript functions and set up native time-driven triggers.
- Google Sheets Macros: Useful for recording simple, single-click repetitive keystrokes or formatting steps within an open file, though macros cannot execute background logic automatically on a cloud schedule.
Do I need to keep my computer turned on for scheduled scenarios?
No. Once configured and saved, scheduled scenarios run entirely on Google cloud servers via the Process Sheets service. Your computer can be completely off.
Can I change sheet ranges after creating a schedule?
Yes. You can edit target sheets and cell ranges directly in the Schedule menu.
Is my spreadsheet data secure with Ablebits?
Yes. Process Sheets processes data strictly according to your configured scenario settings to perform matching, merging, and log creation inside your Google Workspace environment. Data is never stored on external servers.
Ready to eliminate manual updates?
Launch Merge Sheets, set up your scenario in under two minutes, and take full control of your scheduled tasks!
